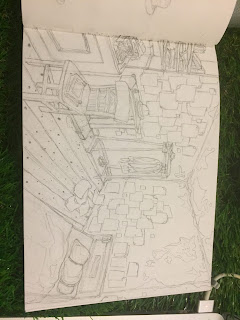
Using Daisy's concept art of the backgrounds, we both went about making the set.
I started by breaking down the wooden pallet we had, which would later become wood for the walls.
Wooden Pallet:
Then, using an old door frame, this became the base of the set. To the top of this, I nailed down long strips of wood for the floorboards, leaving slots for the walls.
Floorboards:
The outer walls were made from wooden slats that were attached with other adjoining slats. The middle walls were joined differently as both sides of the wall are going to be visible. To attach them, I connected the wooden slats with dowels, which was a much longer process.
The bottom of all the walls are connected with dowels so that they are detachable from the main set (for easy camera access). I'm very pleased with the rustic look of the set. It has a very solid feel about it, as if the rooms were actually being lived in and I've learned that set design is definitely an avenue I want to explore further. One improvement perhaps would be checking how the set looks in some of the camera positions (to check whether we need to build a ceiling for instance).
Walls:
- Rustic, solid set appearance has a lot of appeal
- Every wall is detachable for ease of camera access, dynamic moving door parts
- I've learned stop-motion set design is the path I want to go down
- Set is completely recycled from old wood (very low budget)
- Wall panelling above the doors are weak points
- Door hinges are quite fragile
- We didn't have a big enough drill piece (for 10mm - the diameter of the dowels), so making holes between the walls was not time-effective
- The finished walls have a lot of appeal and distinguish themselves from the floor
- The pealing effect clearly conveys a poor, decrepit environment
- The furniture has a lot of appeal, in particular the shelf with the match boxes on
- The bed sheets looked realistic and gave a new texture to the set
- The paper maché was very fragile and didn't stick to the walls properly
- We painted the walls with a very bold blue, which didn't fit with the environment (this cost us time and added to the budget)
- It was hard getting the props/furniture to be at the same scale
- Looking back it would have been wiser to paint the paper maché and then peal it as some of the paint went onto the wood beneath, going against the illusion of a pealing wall paper


No comments:
Post a Comment