Friday, 27 November 2020

Animation Testing

We started by setting up the two lights we had, around the set from different angles. We played around with the gels (blue, orange, yellow) that we had until we had lighting that matched Daisy’s background plans. We also had two different lenses (macro and a zoom lens) to experiment with, which effected the set, such as elongating rooms or making them look narrower. For some shots, the edges of the set were visible so I built a ceiling to go on top, but angled in such a way that it would not block out the light sources. We experimented like this until we found the best lighting and lens settings for every room.


The first animation test involved one of the doors swinging open. The effect of the blue and piercing orange gel light gave a very nice contrast to the film. The shadows created here will also be very important. From this test, we’ve decided to incorporate a scene where the main character’s shadow is projected onto the wall by the orange light, when the protagonist walks into the secondary character’s room, with focus only on the shadow. The only thing I'd change about this scene is make the door open much slower, by taking photos of it 'on twos'.


The next test involved a scene where the hands of the wall people spring out of the fireplace. I was very pleased with how this went - the hands appeared to have a lot of weight to them and we found focusing on anticipation and 'easy ease' spacing the most useful principals for this element. The only thing I'd critique with this scene was one of the finger's movements were unnatural in places but you have to look out for it to notice it. This will be the most intricate scene in the animation - the 5 seconds of footage here took 2 hours to make. 


Harry did another test, animating the main character.


What Went Well

  • The outcome of the tests matched the background plans very closely
  • The tests develop on from the animatic stage, where shots that we thought looked good in the testing stage, will be inserted into the animation
  • The tests have been very useful for finding problems early on, which we can avoid for the real thing, such as finding a way of stabilising the hands but also allowing them to slide forward - I got around this by building a vice contraption. 


Criticism

  • One lens accentuated the height difference between the main and secondary character too much, so we had to adjust the camera angle and lens for the corridor confrontation scene
  • We jogged the camera slightly in some of the tests, but know next time not to have the camera on the carpet when we're taking photos
  • The tests have weakened the puppets a bit, however they have been necessary tests as it has given us a feel for how they animate

Friday, 20 November 2020

Study Task 8 - Writing the Essay

I've finished a first draft of the essay. I'm pleased with what I wrote however the rough word count that I was keeping too meant that I had to cut down on some of the less relevant case studies I researched including the rain effects used in Aardman's 'A Matter of Loaf and Death', and the water effects used in 'Gon, The Little Fox'. The case studies I kept were the ones that helped answer the question directly and ones that I was able to find a lot of background research on. 

What Went Well
  • I had plenty of research to help back up my points
  • The practical response directly answers the question I'm investigating
  • I have time to look over the essay and find ways of improving it
Criticism
  • One of the points I was making focused on monetary investment in stop-motion, which was steering away from the question so I will remove this in the next draft
  • The essay is still a few hundred words over the word count
  • In the next draft I will focus on triangulating the critics more rather than just listing them and not comparing them


This week I finished the final draft of the essay. I made sure the sources were triangulated and tweaked the essay in places where I was straying from the question. I added a bibliography as well as all the images that I was referring to. I'm pleased with the essay I've written and it fits well with the practical response. The tutor was pleased with where I've got to with the project and asked me to read over the essay and bibliography to check for errors. 

Saturday, 14 November 2020

COP Practical Response

I've finished my practical response for the essay. I incorporated everything that went well with the initial tests in order to make the animation as realistic as possible. I include both the raw analogue stop-motion footage and the finalised stop-motion animation after post-production, to investigate my question which asks whether the raw analogue stop-motion footage is realistic enough on its own or whether it needs the aiding of computer technology to really make it look realistic. 


What Went Well
  • It helps a lot with the investigation of my question, proving that the analogue stop-motion footage is not enough on its own to make a realistic ocean scene
  • The response has examples from all three sub-categories that I split my research into
    • water expanses - the ocean
    • moving water - ocean spray
    • gaseous water - clouds
  • I'm pleased with the level of realism I managed to aesthetically produce
Criticism
  • If I was to improve upon the response, I would make the sound effects myself instead of getting them from a free sound website
  • I would make the clouds and spray more animated next time, instead of being a static image
  • Playback on After Effects on my laptop was very slow, so it took a long time to produce, especially when effects started being added

Monday, 9 November 2020

Study Task 7

Status Report
Currently, I've finished researching all the secondary sources I need. I still need to conduct some primary research, although this will be harder to do under the latest lockdown restrictions. I'm also near the completion of the practical response - I'm in the post-production stage of refining the ocean animation and adding sound.
The project is sticking to the question that was formulated with the tutor. The practical response has also been very successful and has helped prove that the stop-motion needed post-production work done to it to aesthetically get it to a realistic enough level.


Practical Research Statement
I intend to visually and practically investigate whether it is possible to animate an aesthetically realistic ocean scene in the analogue medium of stop-motion, without digital assistance. 
In order to do this I will by making my own short animation, which features a simulated ocean and cloud backdrop in both calm and stormy conditions. 

Primary Research 
  • Wooden 'cinderkit' wave mechanism 
  • Watching the scenes of animations that feature water
Secondary Research 
  • Studies of photos/videos out in the middle of the sea
  • Watch behind-the-scenes of animations that feature stop-motion water
  • Watch/read interviews with the creators of related animations
  • Read the 'art of' books of the related animations
  • Read up on online sources with reliable, relevant information on these animations

Media and Processes
  • Stop-motion based practical response, with post-production editing on After Effects
  • Short animation to demonstrate working with this medium
  • Woodwork skills to build the stage for the ocean to be on
  • Written essay

Context
  • The ocean is based on the ocean tests created in 'Kubo and the Two Strings' by Laika and the ocean featured in 'Two Balloons' by Mark Smith. 
  • The cloud backdrop is based on the clouds in 'Two Balloons' by Mark Smith, the cloud backdrop in 'Mound' by Allison Schulnik and the fog in 'Hedgehog in the Fog' by Sergei Kozlov and Yuri Norstein. 


Sunday, 8 November 2020

Practical Response - Wave Tests

The ocean set was built and ready to be animated with. I had a few practice tests to begin with to get used to the wave motion, before animating the real thing. 

First and second test:
There was a good build up in the wave however it ends abruptly when it gets to the end of the table. The motion is very jumpy for a phenomena like water that flows so smoothly in real life. There are also no trough areas, where gravity would act on the water, unlike with the bin liner, which is too light to be impacted enough by gravity over such a small surface area.


Third test:
Much better build up in the wave, with a much smoother flow, due to the increased number of frames. The trough areas are evident in this test due to the skewer ends having been glued to the bin liner to better control it. The beginning to the wave build up however is a little slow compared to the speed of the rest of the wave. 

Third test in post-production:
This is close to how the final animation is going to look, however the wave pattern doesn't loop yet and it doesn't have the cloud backdrop and ocean sounds added. The spray however adds to the illusion that it's moving waves.


Building the Practical Response

This week I built the practical response. 


I then designed and built the clouds for the backdrop. Although not having such a prominent role in the practical response, it's another example of water (gaseous water) that I'm investigating in the essay, and additionally will compliment the atmosphere of the calm and stormy sea scenes. 


What Went Well
  • The double layer of cardboard held the skewers in place so no slats were needed underneath
  • The wood and cardboard was recycled so it didn't cost anything
  • The glued skewer ends allowed for troughs to be created
  • The build went how I imagined it to go and I'm confident I can make stop-motion waves
Criticism
  • The pins and the packing peanuts didn't work as the skewers were too close together and were very fragile, however the skewers worked best on their own in the end
  • The bin liner had creases in it that made it look unnatural as an ocean surface
  • The glue on the ends of the skewers was still quite fragile

Thursday, 5 November 2020

Building The Set

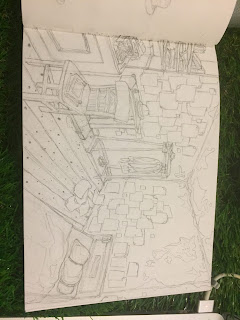
Using Daisy's concept art of the backgrounds, we both went about making the set. 


I started by breaking down the wooden pallet we had, which would later become wood for the walls. 

Wooden Pallet:


Then, using an old door frame, this became the base of the set. To the top of this, I nailed down long strips of wood for the floorboards, leaving slots for the walls. 

Floorboards:


The outer walls were made from wooden slats that were attached with other adjoining slats. The middle walls were joined differently as both sides of the wall are going to be visible. To attach them, I connected the wooden slats with dowels, which was a much longer process. 


The bottom of all the walls are connected with dowels so that they are detachable from the main set (for easy camera access). I'm very pleased with the rustic look of the set. It has a very solid feel about it, as if the rooms were actually being lived in and I've learned that set design is definitely an avenue I want to explore further. One improvement perhaps would be checking how the set looks in some of the camera positions (to check whether we need to build a ceiling for instance). 


Walls:


What Went Well
  • Rustic, solid set appearance has a lot of appeal
  • Every wall is detachable for ease of camera access, dynamic moving door parts
  • I've learned stop-motion set design is the path I want to go down
  • Set is completely recycled from old wood (very low budget)
Criticism
  • Wall panelling above the doors are weak points
  • Door hinges are quite fragile
  • We didn't have a big enough drill piece (for 10mm - the diameter of the dowels), so making holes between the walls was not time-effective


After the foundations of the set were in place, we paper-machéd the walls.


We then painted over the paper maché in a dark blue, fitting to Picasso's blue period, however we found this colour overwhelmed the set and chose to use a greyish-white instead, with coloured-gel lighting being the way that we will produce the blue atmosphere. 


We tore away some of the paper maché to give the effect of pealing wall paper. With the walls complete, I fitted the doors and we also carved and built the furniture. I made a shelf, two beds, chimney guard, desk, picture frame and extended the legs of some chairs, to keep them proportionate to the other furniture. I then cut down material and sewed the duvets for the beds. They have a lining of tin foil so they can hold their position better.


What Went Well:
  • The finished walls have a lot of appeal and distinguish themselves from the floor
  • The pealing effect clearly conveys a poor, decrepit environment
  • The furniture has a lot of appeal, in particular the shelf with the match boxes on
  • The bed sheets looked realistic and gave a new texture to the set
Criticism:
  • The paper maché was very fragile and didn't stick to the walls properly
  • We painted the walls with a very bold blue, which didn't fit with the environment (this cost us time and added to the budget)
  • It was hard getting the props/furniture to be at the same scale
  • Looking back it would have been wiser to paint the paper maché and then peal it as some of the paint went onto the wood beneath, going against the illusion of a pealing wall paper

Making The Protagonist Character and the Hands of the Wall People

I'm working on the protagonist character, which is based on the designs made by Harry. 


This week I made use of the woodwork area by carving the head of the main character from basswood. The first head I carved was too big and nose too flat. However this was easy to change. I went back to woodwork and made the head smaller, carving around the nose, so that it stuck out more. I'm pleased overall with how the head went - the eyes and ears have a lot of character, however some improvements would be that the head is still quite flat and it was hard to completely stick to the character turnaround when working with the wood. 

First head shape:


Final head shape:


What Went Well

  • Expressive head the second time around
  • Carving taught me to work in a different way, by taking away from the object rather than building it up
  • Eye and mouth sockets will allow for plasticine features to go over the top
  • I've learned I want to go down the avenue of woodwork in stop-motion
Criticism
  • Carving took up most of the day, it required a lot of patience
  • I couldn't afford to make any mistakes, if I carved too deep, I would have had to start again
  • The first attempt carving the head wasn't so successful however it got me used to the process
  • The wood would have been too fragile to have the jaw on a hinge so we changed this idea to putting plasticine over the top instead.
  • It was hard keeping the carving to be an exact replica of Harry's designs

I then worked on the body, using Harry's turnaround as the reference. This involved using 3mm wire to make the armature, while missing out the head, hands and feet, which will be wooden. The joints were then put in place, using putty that solidifies after a few hours.


The next step involved blocking out the bone areas, to make the character act more like a human and prevent it from becoming floppy. This was achieved using modelling foam. 


After this, I wrapped tin foil around the foam to bulk out the body. I also added the wooden hands and feet, which were able to slot into the metal armature. 


Clothes also helped to bulk out the character and give it more form, which were made out of felt and had a lining of tin foil. 


The legs were made first, and then safety pins buttoned-up the shirt. Extra felt was put over the shoulders which is often a weak spot in the puppets.


Holes were put in the feet so the puppet can be clamped down, ready for shooting.


The character in his room:


His skin was painted white so that it will glow a blue colour when under the blue gel lighting.


Finally the hair and plasticine facial features were added. The eyes were made of milliput so that they stayed circular.


Once this character was complete, I made the hands of the wall people. I carved each thin, long bone of the hands.


I drilled the ends of every bone to allow for the wire to be slotted in, which will act as the joints. 


These were then painted white and the wire was glued in place.


What Went Well
  • The puppet is able to stand up unassisted
  • The felt and wood are much more durable materials to work with than the plasticine I used last year
  • The tin foil on the clothing helped bulk out the character
  • The plasticine will allow for the character to have a range of facial expressions

Criticism
  • The foam was hard to carve with the carving knife, instead it needed an even thinner blade such as a Stanley knife. 
  • The foam body was too flat so needed to be bulked up with tin foil
  • Some of the tin foil (used below the clothes) and the screws for the feet will be visible on camera. Next time I'd leave a gap of a few millimetres between the felt and tin foil.
  • The mitten-like hands of the protagonist are unable to move and could have been made with individual fingers in future, however this will not be crucial to the animation